

Getting Started with Bloonix
For getting started, there are different installation guides available, for example for Debian or Rocky Linux.
Once the Bloonix stack has been successfully installed and you have logged into the WebGUI, you can start with the initial setup right away. Since the first steps can be a bit tricky, we’d like to support you with a small guide.
We will go through the following steps:
- Create your own user
- Add a host with a service
- Set up a notification service
Create Your Own User
The WebGUI offers many pages that users can customize according to their needs. This includes the color scheme, the dashboard, the time and language settings, as well as various table views. For this reason, you should create your own user first and log in with that user.
If you have specific requirements regarding username and password policies, you can adjust them in the “System Settings” section. There you can modify the password rules and also define whether usernames must follow an email-address format or not.
Details on how to create a user can be found in the document User Management.
This step is of course optional, and you can also perform your initial setup with the “admin” user.
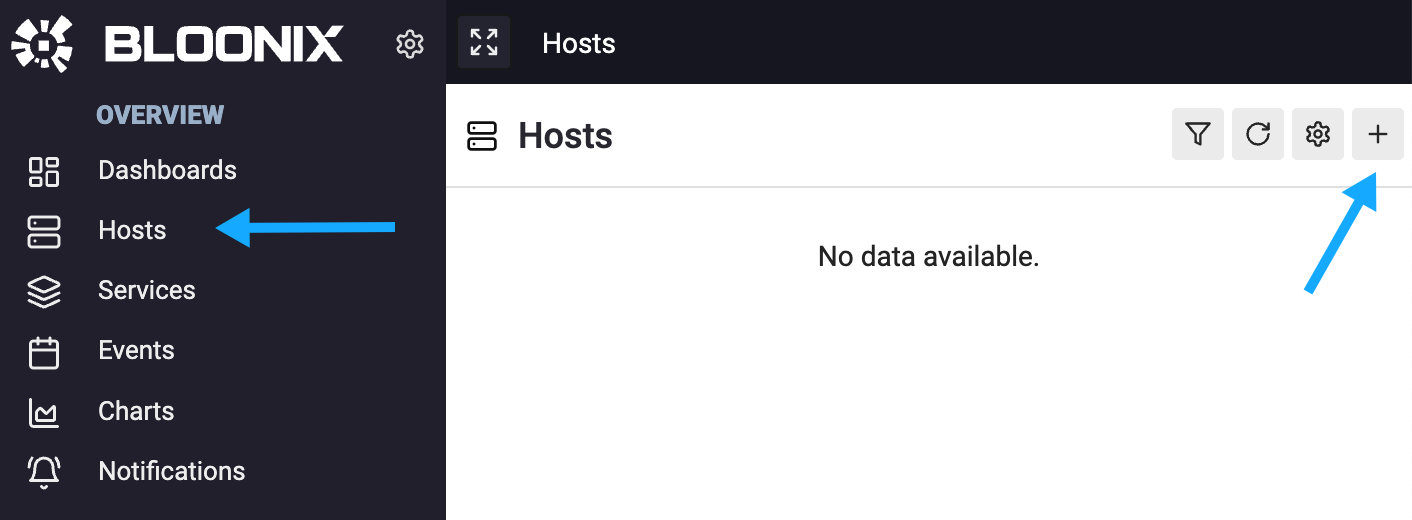
Add a Host with a Service
Let’s start by setting up a host in the WebGUI. As shown in the screenshot, click on the “Hosts” menu item and then on the plus icon.
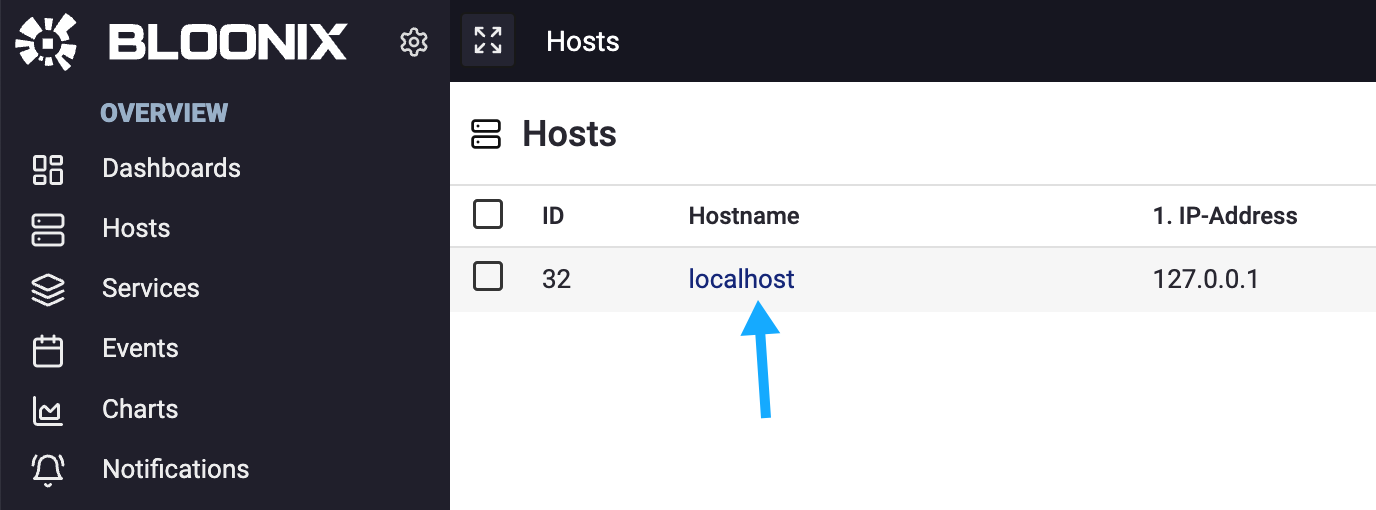
After filling in and submitting the form for creating the host, you will see information about setting up the host ID and password for the Bloonix agent. You can skip this step for now. However, if you want to set up an agent right away, please follow the instructions in the document Service Monitoring.
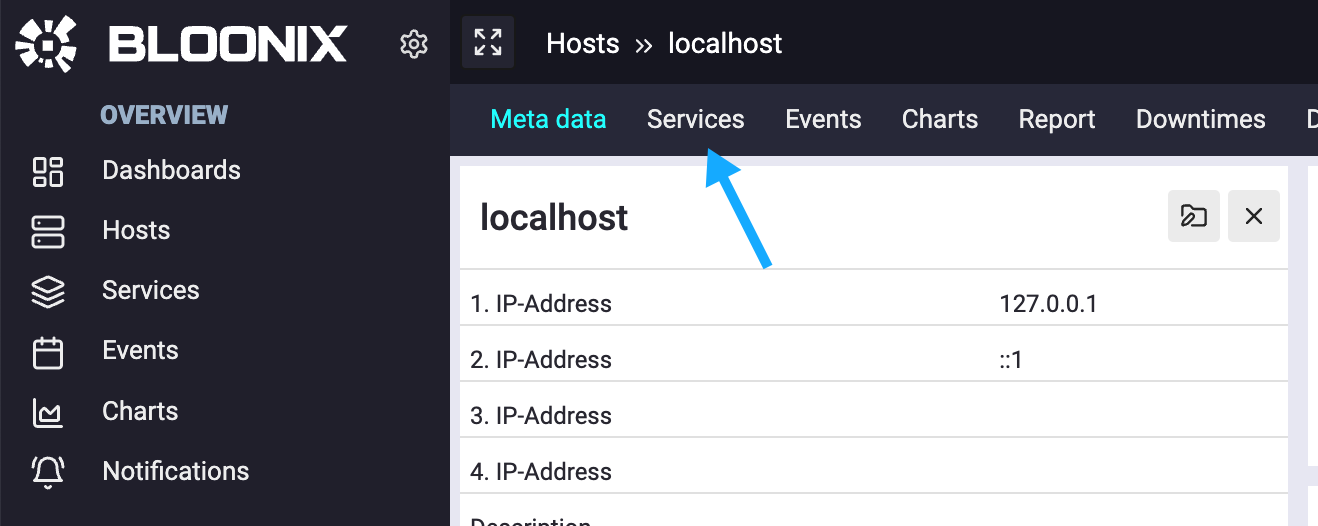
In the next step, we will create a service. Click through the following menus:
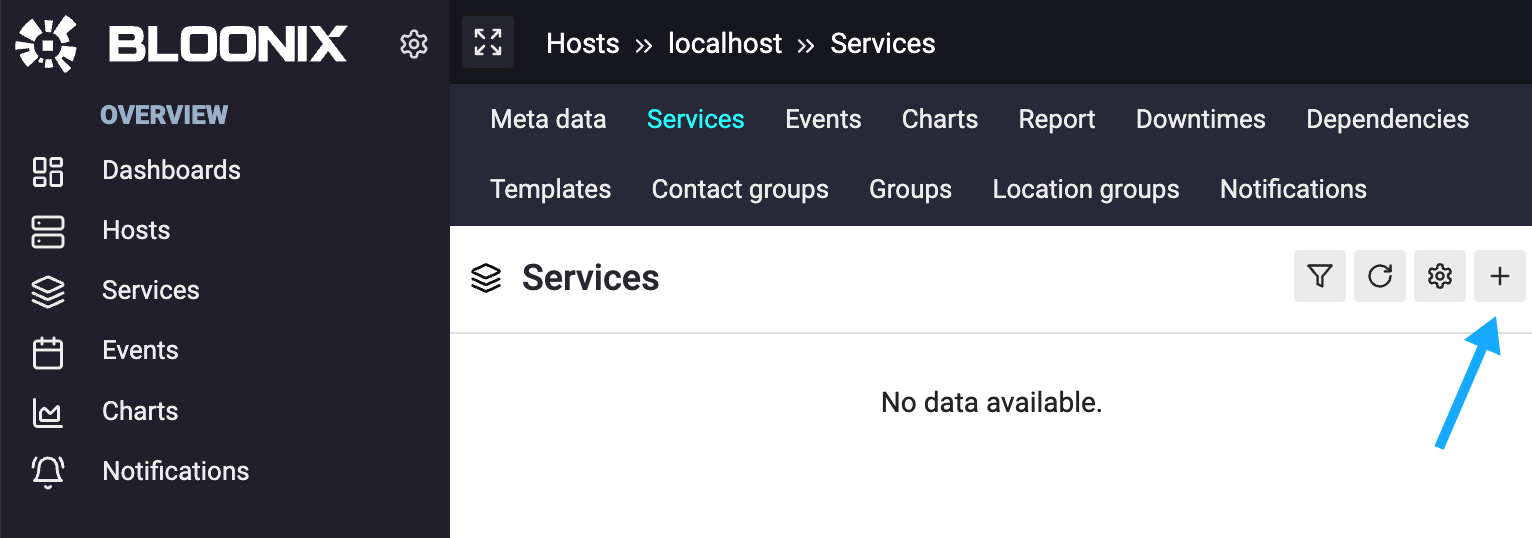
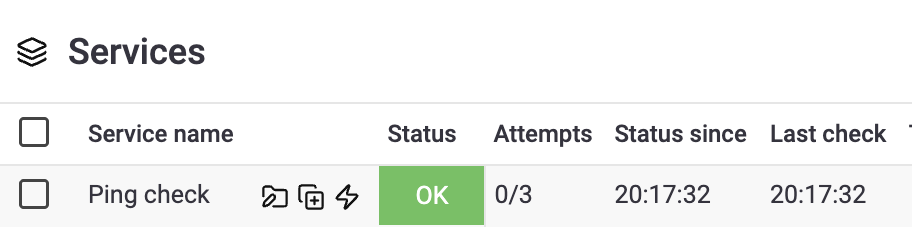
Please create a ping check as your first service. A ping check does not necessarily require a Bloonix agent and can be executed directly by the Bloonix server.

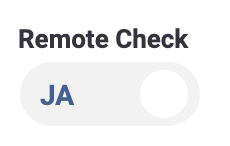
Make sure the Remote Check switch is enabled when configuring the ping check so that it is executed by the Bloonix server. If you want to know what a remote check actually is, feel free to take a look here: Local, Remote, Satellite
Once the check is created, it usually doesn’t take long until the status of the service switches to OK — provided the ping can successfully reach the IP address.
Set Up a Notification Service
Now we get to the most important part of the setup: making sure you get notified if the ping check fails. We already have a detailed document for this, which you can find here: Notifications
It’s important that you follow all steps from the document, because for a host or service to trigger a notification, the following must be configured:
- Set up a notification service (e.g. email or SMS via an HTTP interface)
- Create a contact and define the notification channels
- Create a contact group and assign contacts and hosts
This allows you to precisely define which contact must be notified through which channels for which host.
To be absolutely sure that everything works, you should test the notification delivery. To do this, configure the ping check so that it will definitely trigger an event. For example, you can set the Round Trip Average so that a critical event is triggered when it is greater than 0 — which it always is.
Edit the service and configure the following threshold:

If a notification successfully reaches you, then everything is set up correctly and you can start using Bloonix Monitoring.