

Host Registration
Introduction
Manually creating new hosts can be quite tedious in larger setups. Host registration offers the option of automatically registering new hosts in the WebGUI and adding the host directly to the desired groups and templates. In this way, hosts can be registered in the WebGUI using automation tools such as Ansible, Salstack, Puppet or Chef.
Additionally, hosts that have already been set up can later be assigned to additional templates and have variables set via the host registration.
Setup in the WebGUI
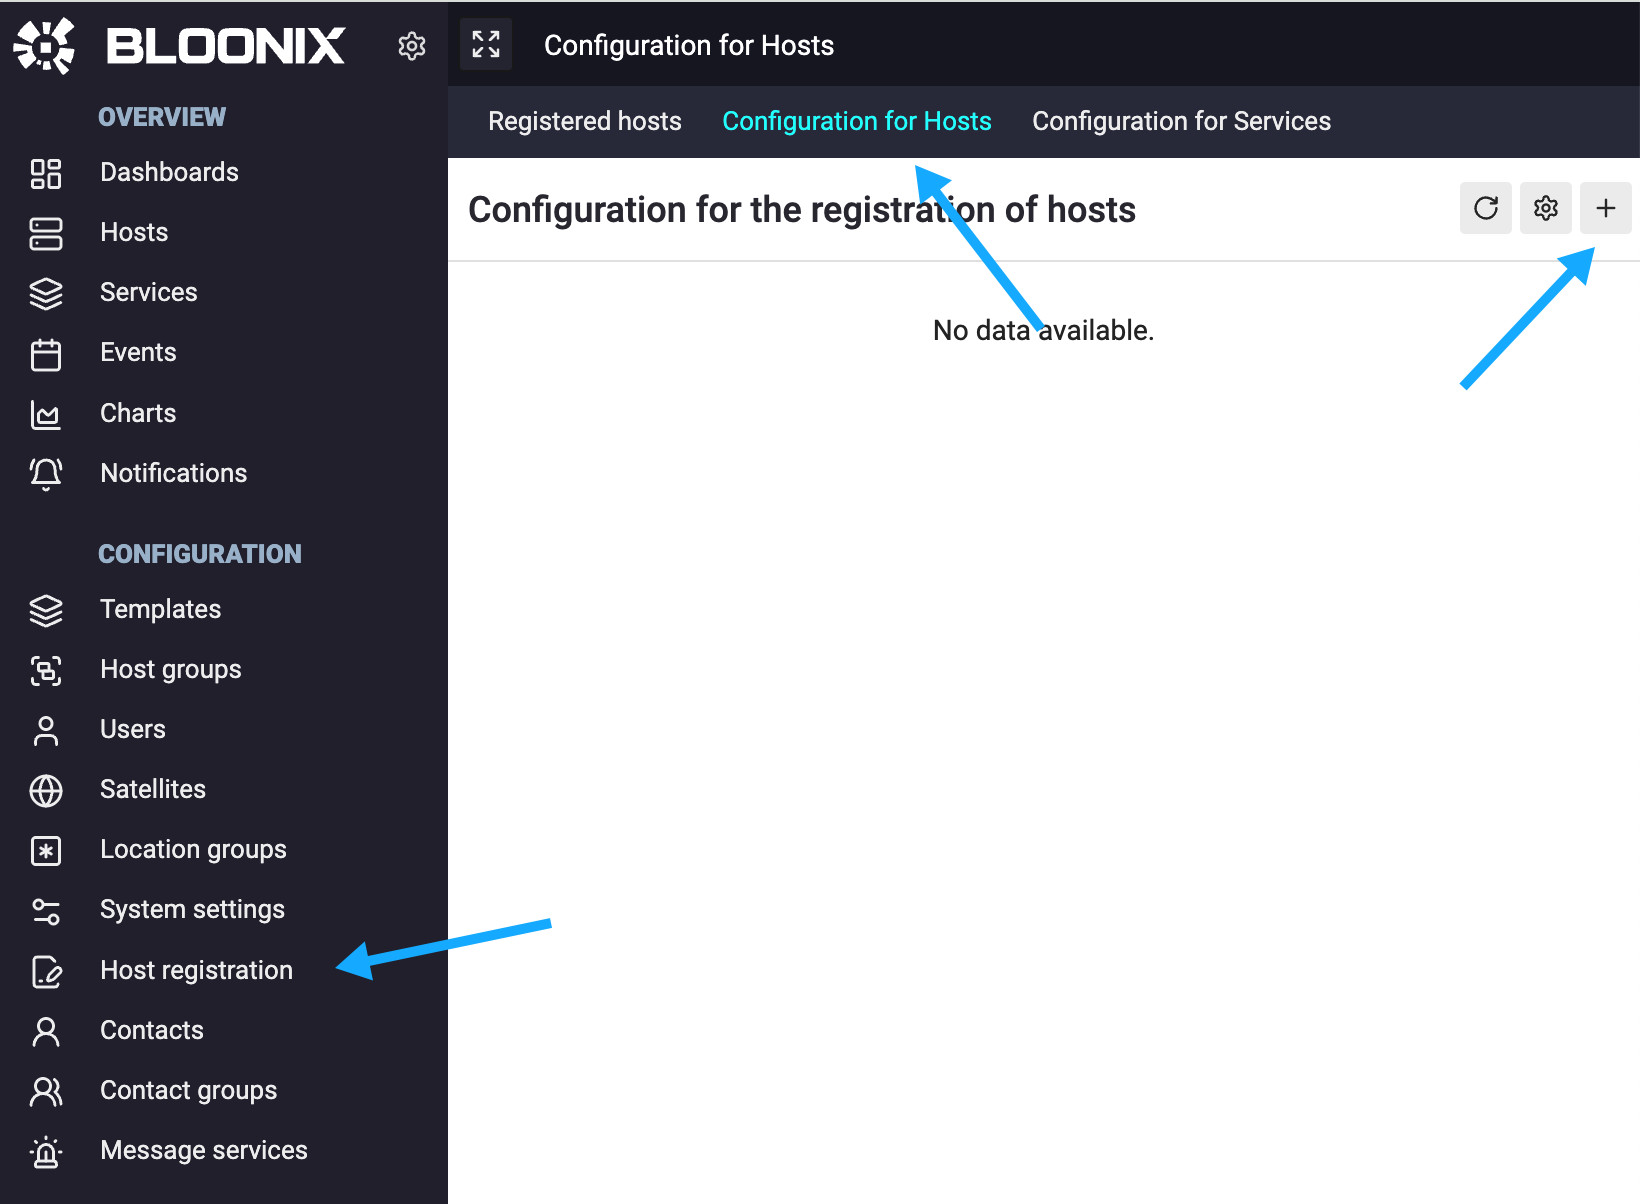
To set up a new automatic registration configuration, click through the menus as shown in the following graphic:
After the form has been filled out and submitted, additional configuration options become available:
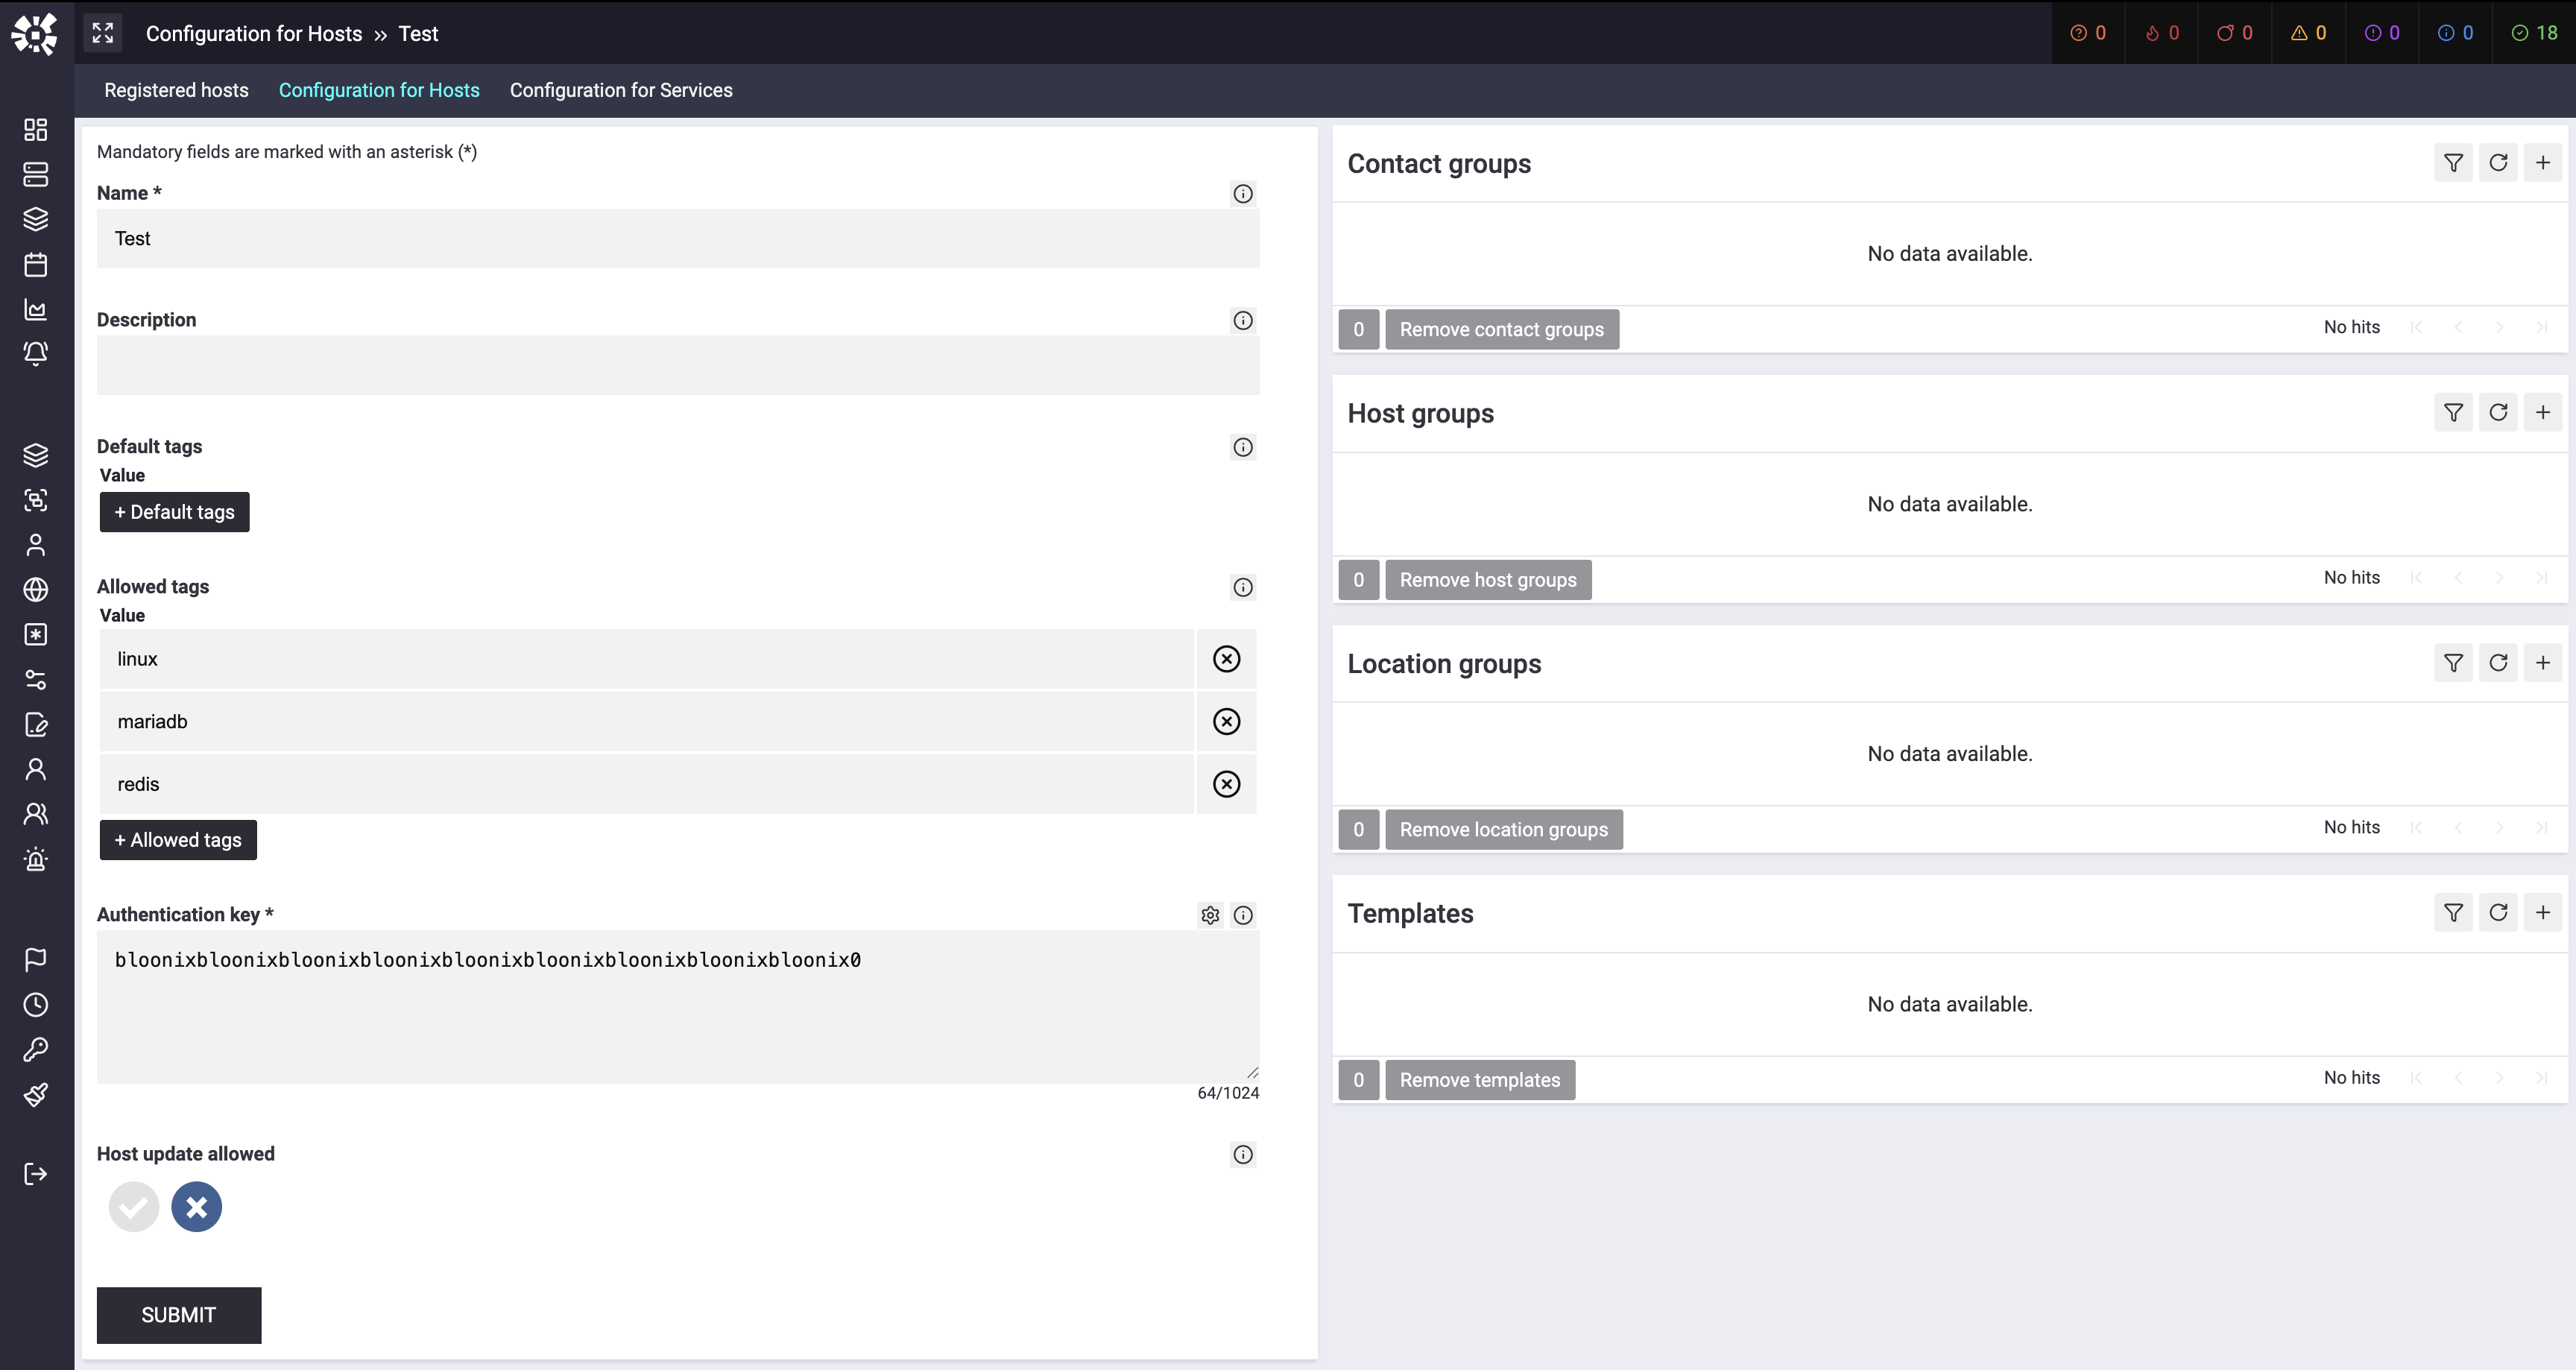
These options allow you to define which groups and templates a host should automatically be added to when it registers. In addition, template tags can be defined that a host is allowed to specify itself during registration.
Registration via bloonix-register-host
Once the setup is complete, new hosts can now be registered in the WebGUI. To do this, simply use the command bloonix-register-host. The script requires a configuration file as an argument, containing the data necessary for registration. An example of the registration file looks like this:
webgui_url https://bloonix-webgui.example
authkey secret
hostname bloonix.example
ipaddr1 127.0.0.1
ipaddr2 127.0.0.2
ipaddr3 127.0.0.3
ipaddr4 127.0.0.4
sysinfo linktext=url
country_code DE
location_class /DC1/Rack410
project_class /Customer/Projectname
tags tag1, tag2, tag3
allow_from ip1, ip2, ip3
variables {
    interface.0.name eth0
    interface.1.name eth1
}
The parameter tags refers to the template tags to which the host should be added.
After the host has been successfully set up, the authentication data is automatically written to the file /etc/bloonix/agent/conf.d/host.conf, and the agent is restarted.
Registration via cURL
It is also possible to submit the registration via a cURL request.
curl https://your-webgui.example/register -H 'Content-Type: application/json' -d '{
    "authkey": "your-very-long-secret-authkey",
    "hostname": "test.example",
    "ipaddr1": "127.0.0.1"
}'
Once setup is complete, you will receive the host’s ID and password. The password is automatically generated and is a 64-character string.
{
    "status": "ok",
    "data": {
        "host_id": 12345,
        "password": "secret"
    }
}
The following parameters with data type are allowed:
| Parameter | Datatype | Meaning |
|---|---|---|
| authkey | String | The authentification key |
| hostname | String | The name of the hosts |
| description | String | A small description of the host |
| ipaddr1 | String | The 1. IP address |
| ipaddr2 | String | The 2. IP address |
| ipaddr3 | String | The 3. IP address |
| ipaddr4 | String | The 4. IP address |
| sysinfo | String | A free text field for a detailed description |
| country_code | String | The country code for the host’s location |
| location_class | String | Location of the host in PATH format |
| project_class | String | Project description in PATH format |
| tags | List [ ] | A list of TAGS of the templates to which the host should be added |
| variables | Dict { } | Host variables to override template variables |
| allow_from | List [ ] | A list of IPs and networks from which Bloonix agents are allowed to access the Bloonix server |
Upon successful setup, you will receive the host ID and password as the response. The password is generated automatically and is a 64-character string.
{
    "status": "ok",
    "data": {
        "host_id": 12345,
        "password": "secret"
    }
}
The following is an example with all allowed parameters:
{
    "authkey": "your-very-long-secret-authkey",
    "hostname": "test.example",
    "ipaddr1": "127.0.0.1",
    "ipaddr2": "127.0.0.2",
    "ipaddr2": "127.0.0.3",
    "ipaddr2": "127.0.0.4",
    "sysinfo": "My first Host registered",
    "country_code": "DE",
    "location_class": "/DC1/Rack100",
    "project_class": "/Bloonix/Project1/Loadbalancer",
    "tags": [
        "linux",
        "postgresql",
        "redis",
        "nginx",
        "port80",
        "port443"
    ],
    "variables": {
        "ifname.public": "eth0",
        "ifname.private": "eth1"
    },
    "allow_from": [
        "127.0.0.0/8",
        "::1"
    ],
}
Activation of registered hosts
Once a host has been registered, it can be activated.
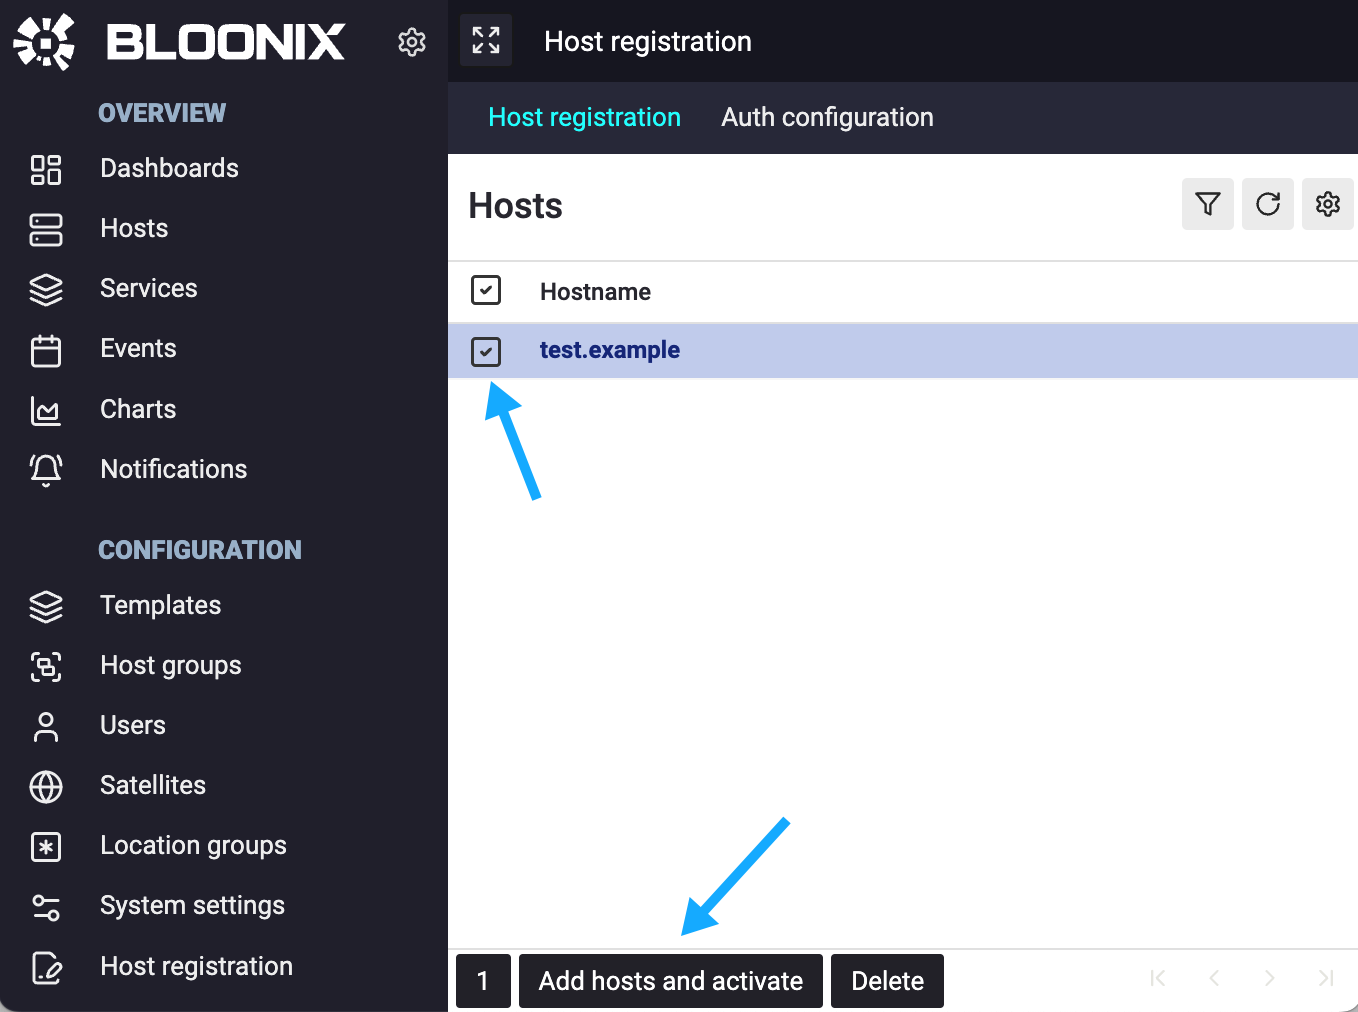
Before activation, you also have the opportunity to check the host and make a few adjustments.
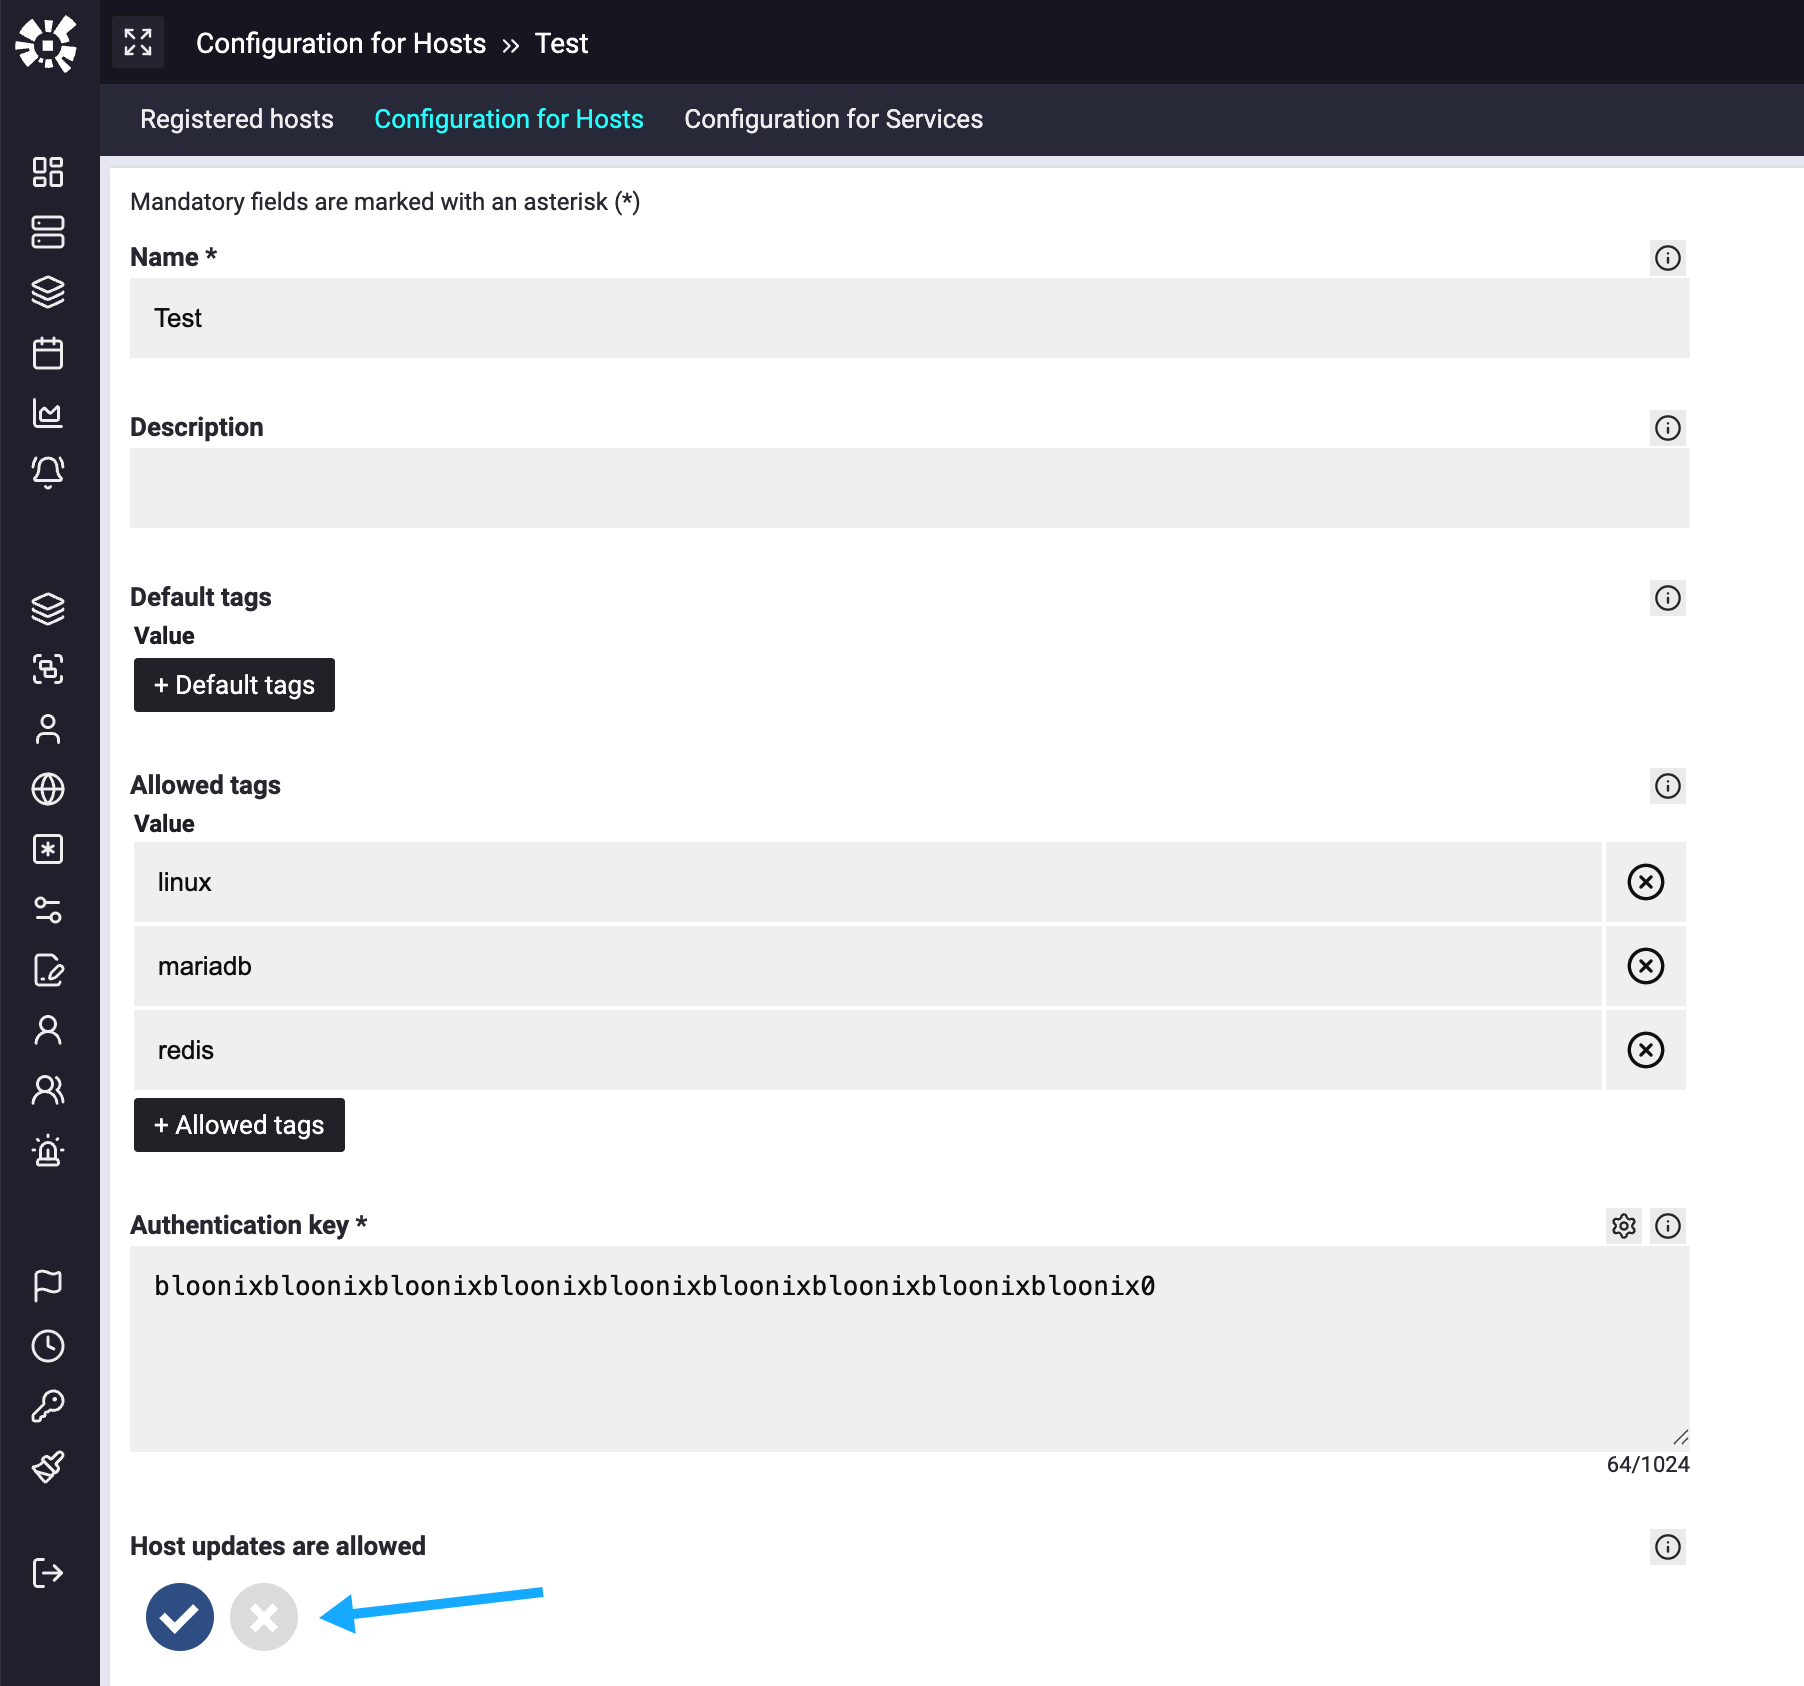
Adding Hosts to Templates
After a host has been registered and activated, it is possible to assign the host to additional templates and set variables. To do this, the option “Host updates allowed” must be enabled.
To assign a host to additional templates, use the following call:
curl https://your-webgui.example/register/host/template/add -H 'Content-Type: application/json' -d '{
    "authkey": "your-very-long-secret-authkey",
    "host_id": 12345,
    "password": "secret",
    "tags": ["linux", "mariadb", "redis"],
    "variables": {
        "mariadb.host": "127.0.0.1",
        "mariadb.port": 3306
    }
}'
The following parameters with data type are allowed:
| Parameter | Datatype | Meaning |
|---|---|---|
| authkey | String | The authentification key |
| host_id | Integer | The ID of the hosts |
| password | String | The password of the host |
| tags | List [ ] | A list of TAGS of the templates to which the host should be added |
| variables | Dict { } | Host variables to override template variables |
Note that only variables which are defined in the templates may be set.